
Printed Fingerings Are Suggestions: How to Choose Better Ones
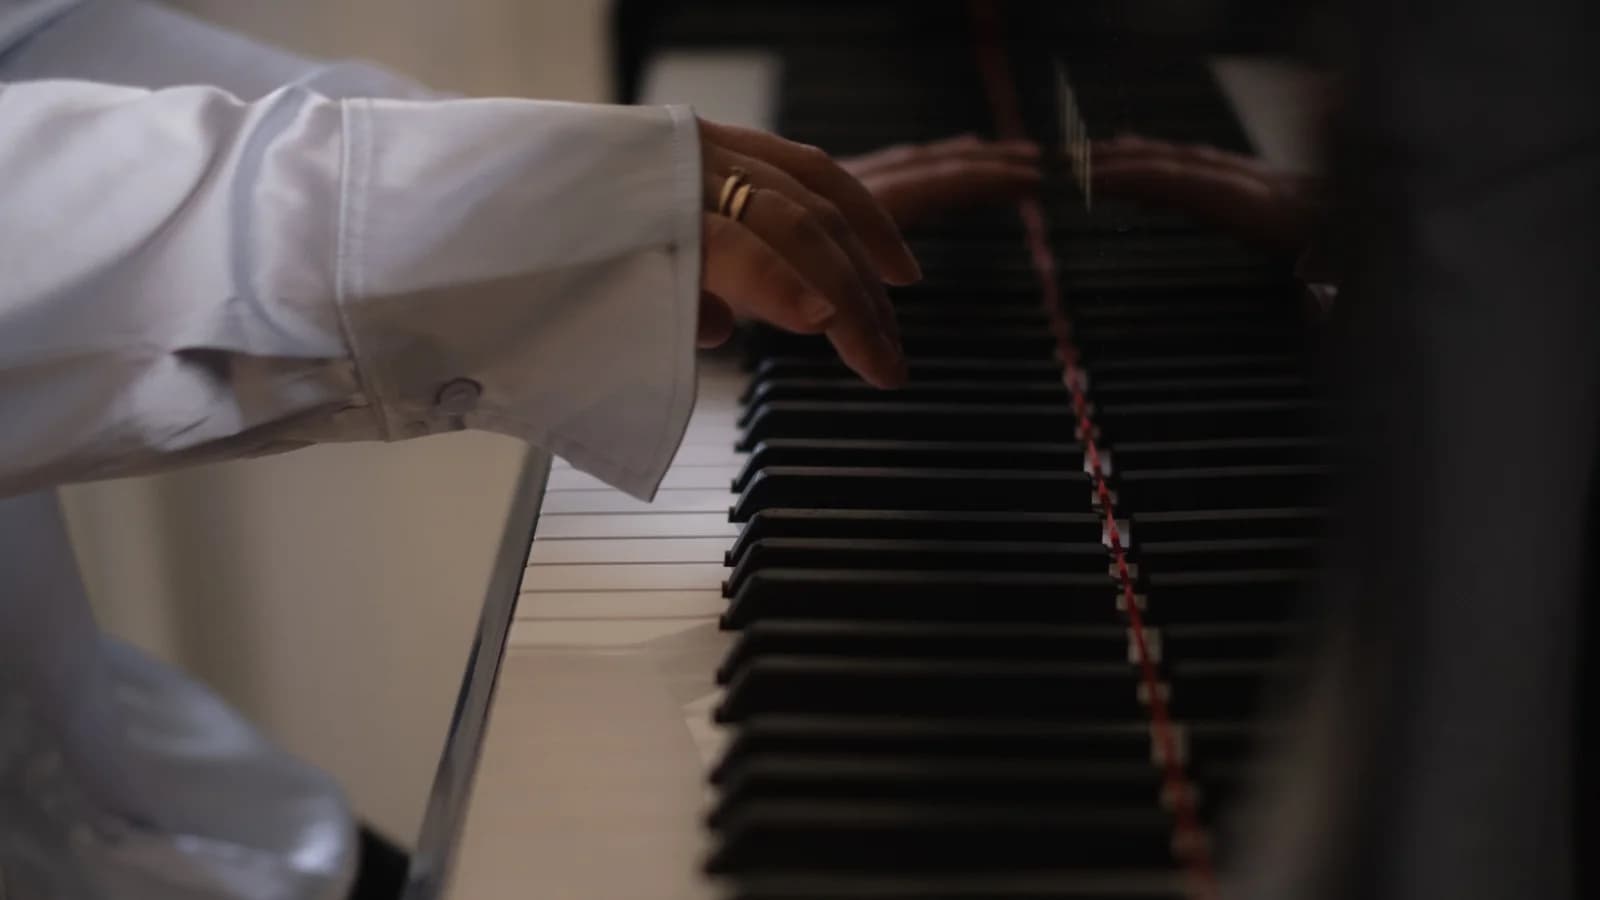
A useful piano fingering lets you play the whole passage with the sound, timing and articulation you intend, and reach what comes next without a last-second scramble. Printed numbers are a starting point. Test an alternative when you can name what it should improve, then keep the version that proves reliable in context.
The difficult part is distinguishing an unsuitable fingering from an unfamiliar one. A new option may feel awkward on its first attempt; an old favourite may work slowly but break down as the phrase moves. A short comparison across several practice days gives you better evidence than changing fingers after every mistake.
What the printed numbers can tell you
In both hands, 1 means thumb, 2 index finger, 3 middle finger, 4 ring finger and 5 little finger. A number may suggest a hand position, prepare a crossing or make a particular connection possible. Before replacing it, look at the notes around it and ask what problem it might solve.
Check who supplied the fingering. An editor’s proposal is not necessarily a direction from the composer. Conversely, a composer’s own unusual fingering may reveal something about the intended articulation or character. Read the edition’s introduction or notes before treating that marking as disposable.
You do not have to preserve a choice that does not suit your hand. But “different” needs a purpose: a quieter thumb arrival, a clearer release, a more dependable change of position. Keep the musical result at the centre of the decision.
Read the destination before choosing the starting finger
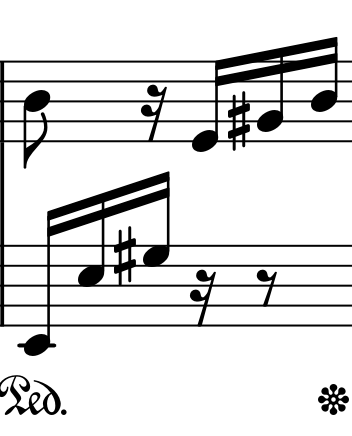
Take the third full bar of Beethoven’s Für Elise, counting the opening two-note upbeat separately. In the left hand, the notes rise from E2 to E3 to G♯3. Here C4 means middle C, so both E notes are below it. These are three successive sixteenth notes, followed by rests; they are not a chord to hold as one stretched shape.
The first E and second E are an octave apart. The G♯ then lies above the upper E, on a black key. Looking only at the first note misses the useful question: how will the hand reach that last note, and what happens after it?
Beethoven, Für Elise, full bar 3. The opening upbeat is not counted as bar 1. The lower staff uses bass clef; the metre is 3/8.
Read the lower staff from left to right
- E2
Start
The lower E, two octaves below E4.
- E3
Move up
An octave above the first E.
- G♯3
Cross over
The black key above the second E.
Pitch labels use C4 for middle C. These notes sound in succession, not together.
See the opening system and score context
The full system retains the clefs, time signature and surrounding bars. The close-up is its fourth measure space, after the upbeat and two full bars. Open the image for a larger view.
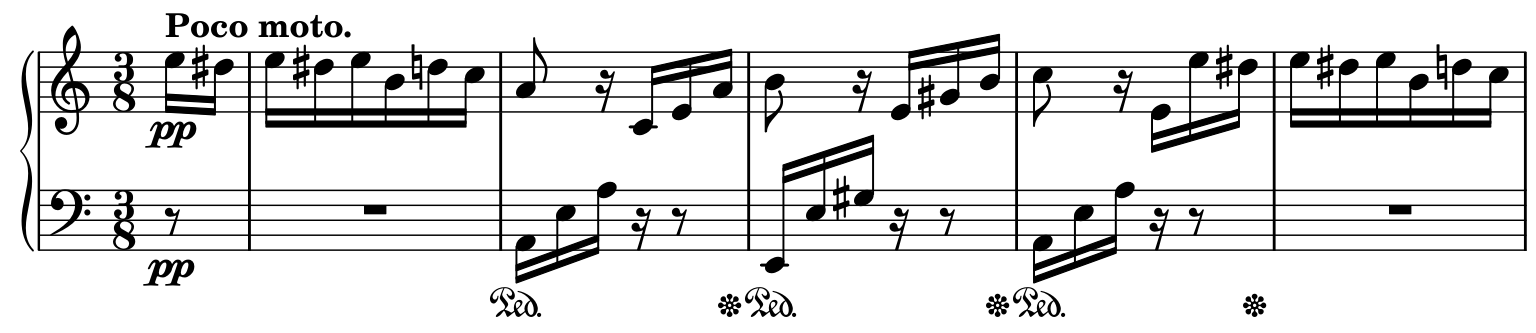
View the complete first page. Existing Mutopia public-domain engraving, unchanged apart from cropping. Source and credit are at the end of this article.
The right hand starts the bar on B, then continues with E, G♯ and B after its rest. Try following that continuation with your eyes while the left hand finishes its figure. The left-hand arrival belongs inside an ongoing musical sentence. It is not the end of the exercise simply because you have played all three bass notes.
The image is a crop of an existing public-domain engraving. The finger numbers in the comparison below are separate teaching suggestions; they have not been added to the score or presented as Beethoven’s own markings.


One-to-one classical piano
Beginner to advanced. Online, worldwide.

Enea
Concert pianist from Vienna
30 minutes · Tokyo studio from October 2026
Compare two options for the same crossing
Leann Osterkamp’s tonebase workbook offers 5–1–2 or 5–1–3 for this left-hand figure. Both use the little finger on the low E and the thumb on the upper E; either the index or middle finger then crosses over to G♯. That gives us a precise comparison with only one changed choice.
Left hand, Für Elise, full bar 3. Both alternatives appear in Leann Osterkamp’s tonebase workbook. These are teaching suggestions, not fingerings printed in the score crop.
| Route | E2 | E3 | G♯3 |
|---|---|---|---|
| A | 5 | 1 | 2 |
| B | 5 | 1 | 3 |
5 = little finger · 1 = thumb · 2 = index · 3 = middle finger. Read each row across as a sequence.
A: cross with the index finger
Play E with 5, the next E with 1, then G♯ with 2. Notice the timing and sound of that arrival. Continue listening while the right hand carries on.
B: cross with the middle finger
Repeat the same passage with 5, 1, 3. Check the same musical detail. A comfortable first try is useful information; compare it again on another day before choosing.
First locate the three keys and check the notes. Then try each route slowly enough to know which fingers you are using. Allow the hand to travel; the numbers are a sequence of actions, not an instruction to keep the little finger anchored to the first E throughout.
Choose a single observation for the first comparison. For example, listen for an unintended accent on G♯ or a hesitation just before it. Use the same starting point and tempo for both versions. Do not make option A quiet and leisurely, then judge option B while rushing.
This example does not establish that 2 or 3 is universally better on a black key. It shows how a small, identifiable change can be tested. You may prefer either option, and a teacher may suggest another route after seeing the complete movement.
Let the key layout and your hand inform the choice
The keyboard has depth as well as distance from left to right. Black keys sit farther back than the fronts of the white keys. In this passage, reaching G♯ involves that change of depth as well as the move upward in pitch.

The white keys extend in front of and between the raised black keys. Notice where each note lies before testing a finger sequence.
Observe where the hand arrives when you use 2, then where it arrives with 3. Does either choice leave you searching for the black key? Can you repeat the movement without making a special adjustment at the last instant? These questions are more useful than comparing your hand with the hand in a photograph.
Hand span matters, but so do finger lengths and the particular combination of keys. Someone else’s comfortable fingering may deserve a trial without becoming your rule. If a passage seems to require a wide fixed stretch, check whether the notes actually need to overlap, whether a shift is available, or whether the musical material is currently too demanding. Our guide to choosing a classical piece at the right level helps with that larger decision.
Test articulation, pedal and the other hand
A fingering can get every note right and still interfere with the phrase. A thumb crossing might draw attention to a note that should stay light. Another route might create a break where you want continuity. Decide what you are listening for before trying to solve either problem.
For the Für Elise example, first hear the left-hand notes without pedal so the attacks and releases are clear. Then test them with the pedalling you are learning for the passage. The rests in the bass staff and the pedal marks are different kinds of information: releasing the keys does not necessarily mean the sound must stop at once.
Add the right hand before making the decision. Listen through its continuation, keeping your chosen left-hand sequence intact. If the bass choice works alone but changes as soon as the hands meet, record that specific result. It may need slower coordination practice before you can fairly compare it. The diagnostic practice loop explains how to turn that observation into one manageable test.
Give each option a fair trial across several days
Use three short comparison sessions on different practice days. This is a suggested way to organise the experiment, not a required number of days for learning a fingering.
On the first day, learn both sequences accurately at a comfortable pace. Write down the actual fingers used. If you keep accidentally switching to the familiar option, you have not yet tested the new one consistently.
On the next day, reverse the order: try B before A. Begin with the preceding bar and continue into the following one. Use both hands at a manageable tempo. Note whether the same hesitation or unwanted accent returns; avoid deciding from one unusually good attempt.
On the third day, repeat that comparison and, if it remains secure, try a short section somewhat nearer your intended tempo. Keep the musical aim and the test length the same. A route that only works during an extended pause before the crossing still needs investigation.
Keep a record of the comparison
A suggested three-session experiment. Copy your notes before leaving this page; this log does not save them for your next visit.
If neither version gives a clear improvement, write “undecided” and bring the passage to a lesson. That is a useful outcome. Your notes show where the uncertainty lies, instead of leaving you with a page covered in competing numbers.
Mark the decision, then check returning patterns
Once you choose, erase the competing option from your working score and mark the notes where a decision matters: an entry finger, a crossing or the arrival after a shift. If you need every note numbered at first, make the markings clear enough to read alongside rhythm and articulation.
Practise entering the chosen sequence from the preceding music and continuing beyond it. Also start at that passage itself, so the fingers do not depend entirely on a long run-up from the beginning of the piece.
When a similar pattern returns, compare its ending before copying the fingering. The same opening notes can lead to a different destination. A change in register, articulation or the other hand’s part is a reason to inspect the route again, not automatically to replace it.
Later revisions are possible. Make them deliberately, with time to practise the joins, rather than reopening the choice on every play-through. The aim is a dependable passage that leaves your attention available for the music.
If you would like help making that decision, bring the score, the two options and a short explanation of where each becomes awkward to a lesson. Vienna Piano School offers online classical piano lessons worldwide. You can apply for a free 30-minute trial and mention the passage you are working on, so the conversation begins with a concrete musical question.